
Until recently, I was a loyal Android user. But, after yet another phone with issues, I finally bit the bullet and got my first Iphone! So, you can imagine the new features that rolled out with the IOS 14 update had me really excited because it brought something that android has been using forever – apps.
IOS 14 allows you to customize your home pages with the apps and widgets you use, and to hide any that you don’t need all the time. It also lets you make your home page more aesthetically pleasing.
I spent a while watching and reading tutorials to figure out the best way to customize my phone. This is what I came up with:
I shared these on my Instagram and the consensus was unanimous – how did I do that? So, keep reading if you want a little tutorial on how to customize your home page:
1. Pick a theme
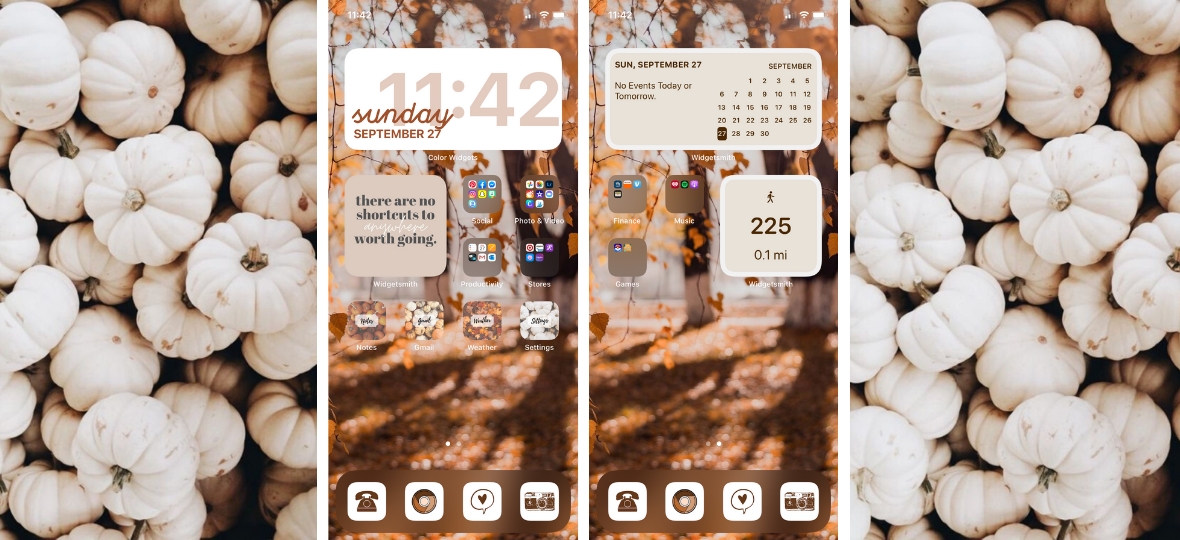
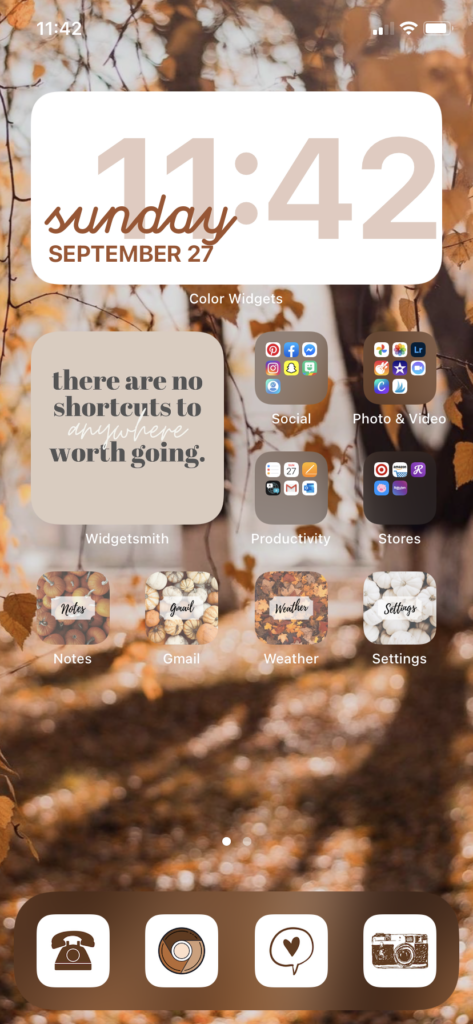
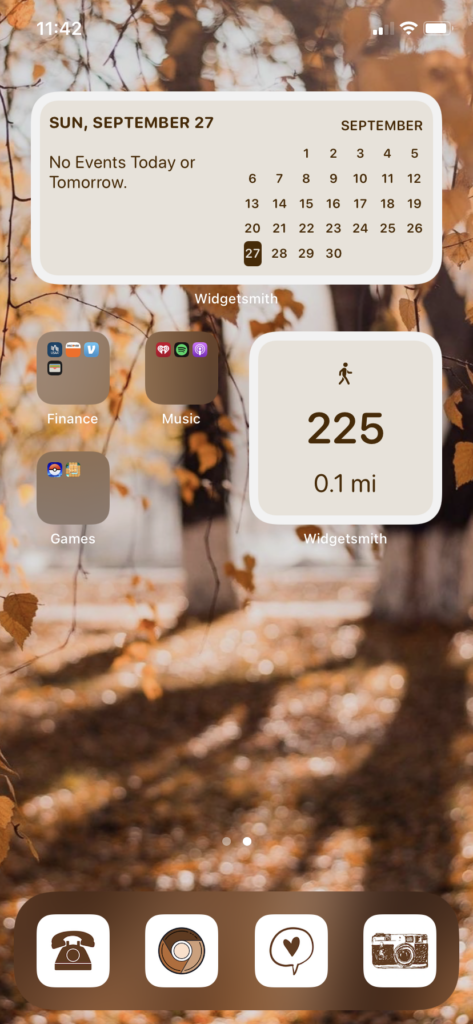
First things first, pick a theme you want to stick to to make your look more coherent. Because I am craving fall (which is hard to find now living in Texas), I settled on an orange and brown fall-esque theme. If you’re interested in the same theme, I have a Pinterest board I started with all my inspo and the images I used.
If fall isn’t your thing, there are plenty of other themes you can go with. Just go to Pinterest or google photos to find a background you like and base the rest off from there. Here’s an example of how I set up Dilan’s home page:

2. Clean it up!
Next, pick out the apps that you would like to stay on your home page(s). You can do this by:
- Holding down on the back of your page. This will cause everything to start jiggling
- Clean things up. A) Drag and drop apps into folders to organize. Or B) Hit the negative sign in the top left corner of the app. This gives you the ability to add the app to your app library. This won’t uninstall the app, but instead just remove it from the home page. The app library can be accessed by swiping to the far right page.
Once you have just the apps you want to keep accessible, we can move on to more customization.
3. Create/download covers for apps
Both Dilan and I decided to keep a couple apps on our home screen outside of folders. But, the normal look of these apps didn’t fit our themes. Using the “Shortcuts app” on your phone, you can display the app as whatever picture you would like.
*NOTE: There is one caveat to this system. When you click on your new shortcut, it will route you first to the shortcuts app before opening the actual app. Its adds a second or two to the response time. If you’re okay with this, keep reading –
I recorded a quick video to show you how to add your custom covers to your apps below.
In text form:
- Go to the shortcuts app on your phone.
- Select the plus in the top right corner to create a new shortcut.
- Click “Add Action”.
- Select “Scripting”.
- Select “Open App”.
- Click on “Choose”.
- Select the app that you would like to open with the shortcut. Here, I use Instagram.
- Select “Next” and name your shortcut. Then hit done.
- Back on the Shortcut app home, select the three dots in the upper right corner of the shortcut you just created. (I know, its annoying to have to go back in, but if you don’t do it this way, the shortcut you add to your home page will just be named “shortcut”.)
- Again, hit the three dots in the upper right corner.
- Select “Add to home screen”.
- Select the photo to the left of your shortcut name and then select “Choose photo” in the drop down. Then select the photo you want to use as your cover and hit “choose” in the bottom right after cropping.
- Finally, hit “Add” in the top right to add to home screen.
Once you have added your new and improved custom covered app, you can remove the regular version to your app library. There are also other commands you can set the shortcut to follow. Just explore within the shortcut app for more specifics.
If you can’t find an image you like to use as a cover photo, or you’d like to add some text, Canva is an amazing free graphic design software I use to create all my graphics. To make my covers, I just used the pre-set size option within Canva for an Instagram post, but any square sized graphic will do.
4. Widgets
I bet within the next few months there will be plenty of new widgets you can use for customization. But, for now I am just using two. Currently, your phone has a few pre-installed widgets for various apps, but they are not customizable. To be able to have more options, the two I have downloaded are:
- Widgetsmith – Lots of different widget options
- Color Widgets – For a customized date/time
These are pretty self-explanatory, but here’s a little overview of Widgetsmith:
- There are 3 widget sizes: small, medium, and large
- Once you decide what size you want, you can add a new widget and then click on it to customize
- The style options show you what your widget will display such as calendar, reminders, photos, etc.
- Clicking through the tabs will let you change background color, text color, font, and border
Once you create your widget, go back to your home screen and hold down until the apps begin to jiggle. In the upper left corner, click the plus button to bring up the widget screen. Scroll down until you find Widgetsmith. Then, choose the size widget you just created and hit “Add widget”. Don’t worry if it isn’t the one you were expecting. Click on the widget that was just added to select the widget you just created.
5. Enjoy your aesthetically pleasing home screen!
Those are the basics for setting up your new home screen! I would love to see what you come up with. If you try out this tutorial, tag me on Instagram with your home screen creations!
~ Happy creating ~

Leave a Comment